Important: Set up your homepage slider before setting up the home page boxes. If you set up the boxes first, they might not display until you set up the slider.
Important: If you create your own images for the home page boxes, they must be exactly 365 x 145 pixels in dimension.
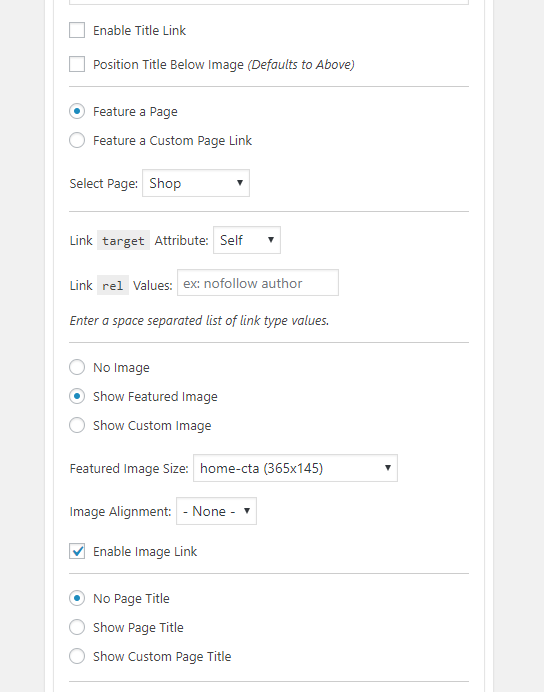
The home page boxes are installed by using the genesis featured pages advanced plugin and widget and setting the images as featured images for the pages that they link to. You can also link to categories or outside pages with this plugin widget.
Make sure that you have the Genesis Featured Page Advanced Plugin installed and activated.
Upload Image Files
Begin by opening the images folder file in your download package and upload the images for Shop, Blog, and Contact to your media center.
Linking to Pages: Set Featured Images
Navigate to your Blog page and set the image for your front page blog box as the featured image.

1. Navigate to Appearance-Widgets.
2. Click on the Genesis- Featured Page Advanced widget and choose Home Page Boxes, or drag and drop the widget into the Homepage Featured Posts widget area.
3. Fill in the options as shown in the image below then click the Save button.

Repeat the process for your other two boxes. The order you place the widget in the widget area will be the order that they are displayed in on the page.
Alternate Method: Image Insertion
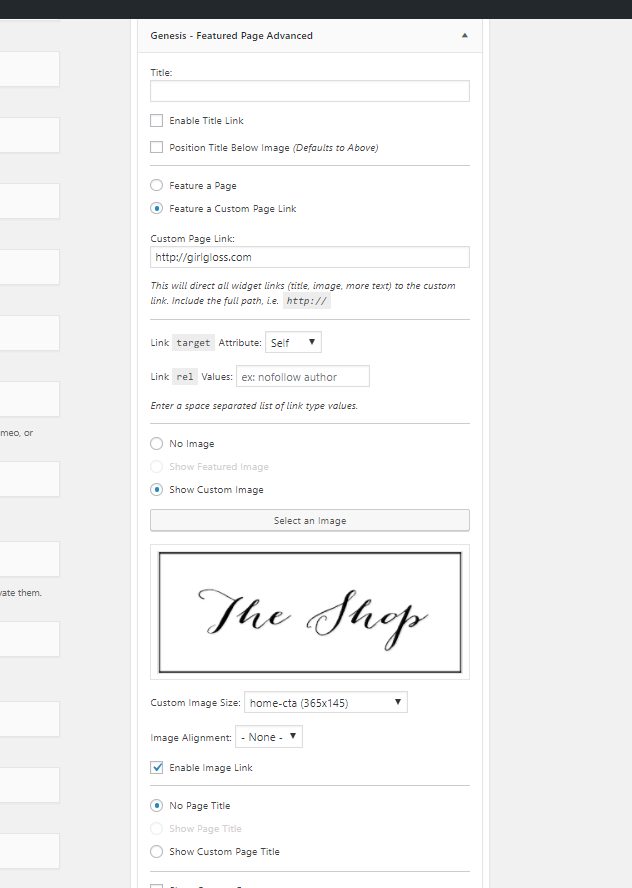
Use this method if you need to link a box to a source outside of your site or to a link that is not a page, such as a category or a post. If you wish to link to a source outside of your site from your homepage boxes. Upload the images for your boxes to your media center then use Genesis Featured Page Advance widget to set the box to a custom link and image. Below is an example of the settings:
