Click here for the full table of contents to setting up your theme: https://www.themefashion.net/woocommerce-wordpress-themes-support/
You need the following plugins for this theme:
Woocommerce, Cyclone Slider 2 (please get version 2 not the original cyclone slider), Regenerate thumbnails, Contact Form 7 (or other contact form plugin), Menu Cart, and Jet Pack. Please install those plugins and activate them. Have Woocommerce set up your pages (it will guide you through this). You can get links here: https://www.themefashion.net/woocommerce-wordpress-themes-support/
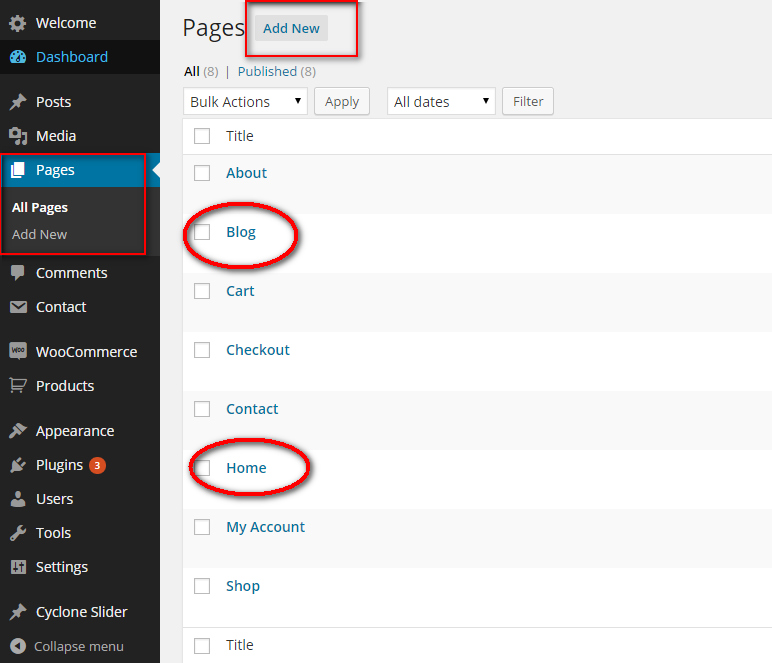
Before you begin, you need to create two pages if you haven’t already done so.
- Create a new page named Home (you can name it anything, but Home is best)
- Create another page for your blog and name it Blog (you can name it anything, but Blog is best)
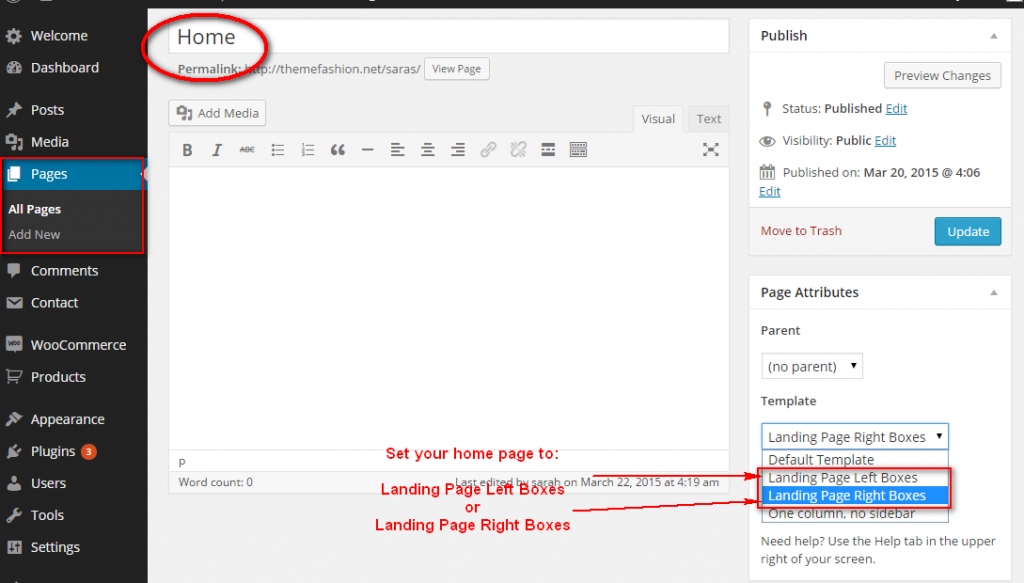
Edit Home Page and select one of the following Landing Page Templates for the Home Page.
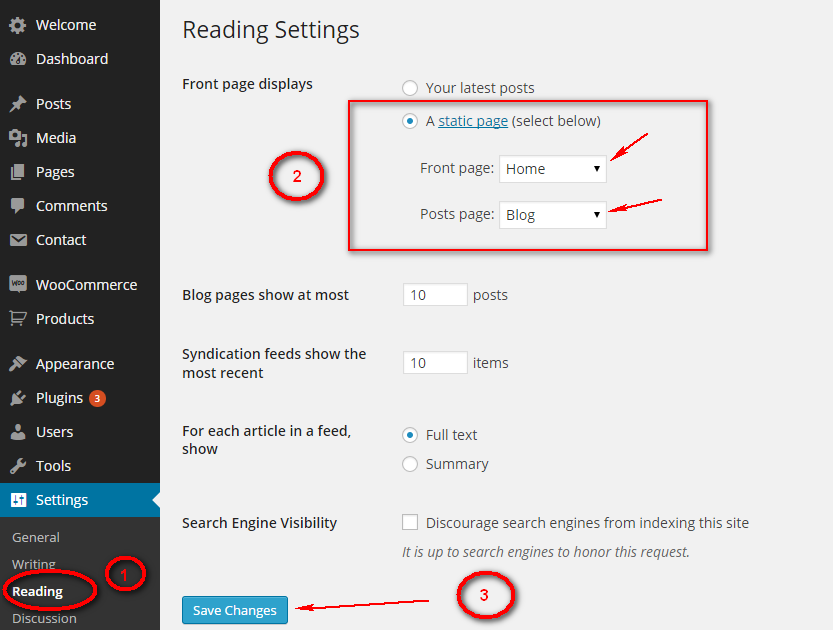
Now we need to set your Landing page and Blog page under Settings -> Reading
There are about 7 widgets on the home page that you can easily setup. You will find these under Appearance–>Widgets.
- Cyclone Slider
- 3 widgets for the (shop, blog and contact),
- Subscribe box
- showcase your featured products or anything else
- and the last one for footer to add your social media icons.
SETTING UP BOXES
SETTING UP CYCLONE SLIDER
SETTING UP SUBSCRIPTION BOX
SETTING UP SOCIAL MEDIA ICONS
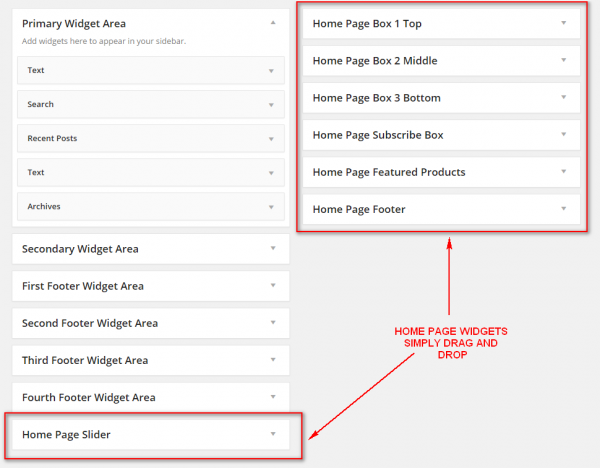
Setting up the boxes (home page box 1 top, box 2 middle and box 3 bottom)
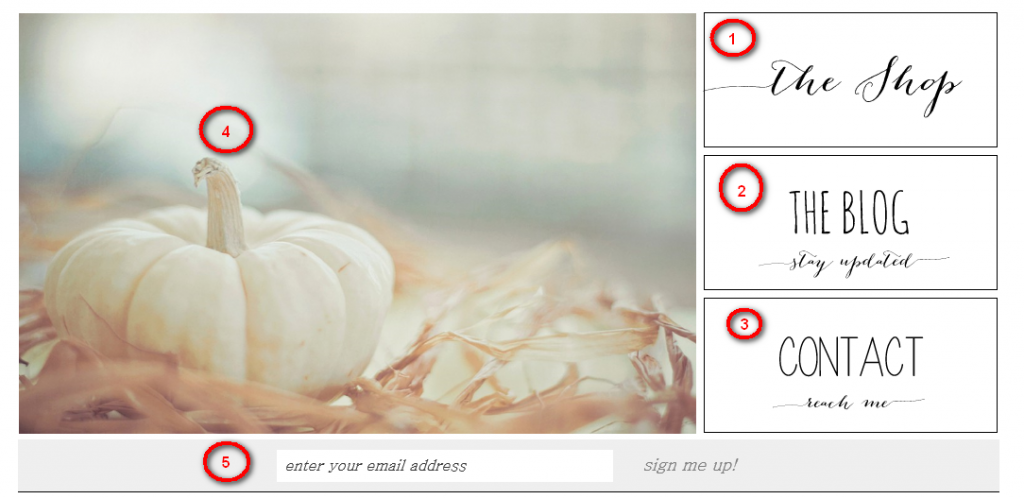
- First upload the 3 home page images that came with the theme (the shop image, the blog image and the contact) to the WordPress media

- After the images are uploaded, click on each image and copy the url of the image from the URL field on the right. We will use the url of the images to enter in the code below where it says “IMAGE URL”.
- For the shop page, leave the word “shop” in the code and add the url for the shop box image. For the blog page. change it to “blog” (or “whatever you named that page) and add the url for that box image . Do the same for the contact box.
<a href="shop"><img src="IMAGE URL" /></a>
Drag and drop the text widget on to the Home Page Box 1 Top. Copy and paste the code in green and update the src=”IMAGE URL” to the url of your image. it should look like the following.
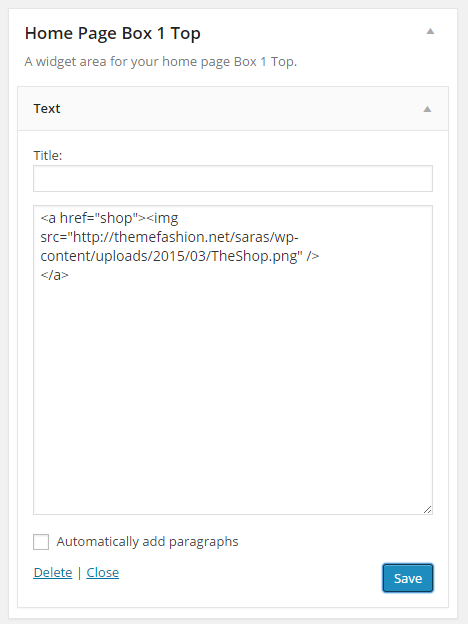
SETTING UP THE BLOG AND CONTACT BOXES
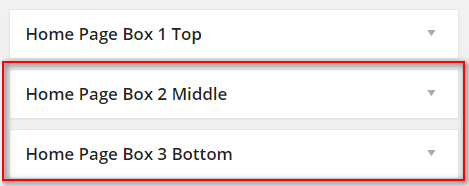
- Simply repeat the above steps for the “The Blog” and “Contact” image Boxes respectively. The Blog image goes in the Middle and Contact image goes in the Bottom box.
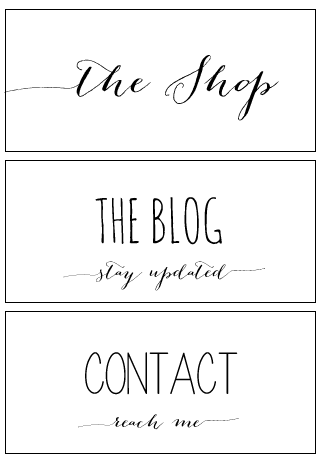
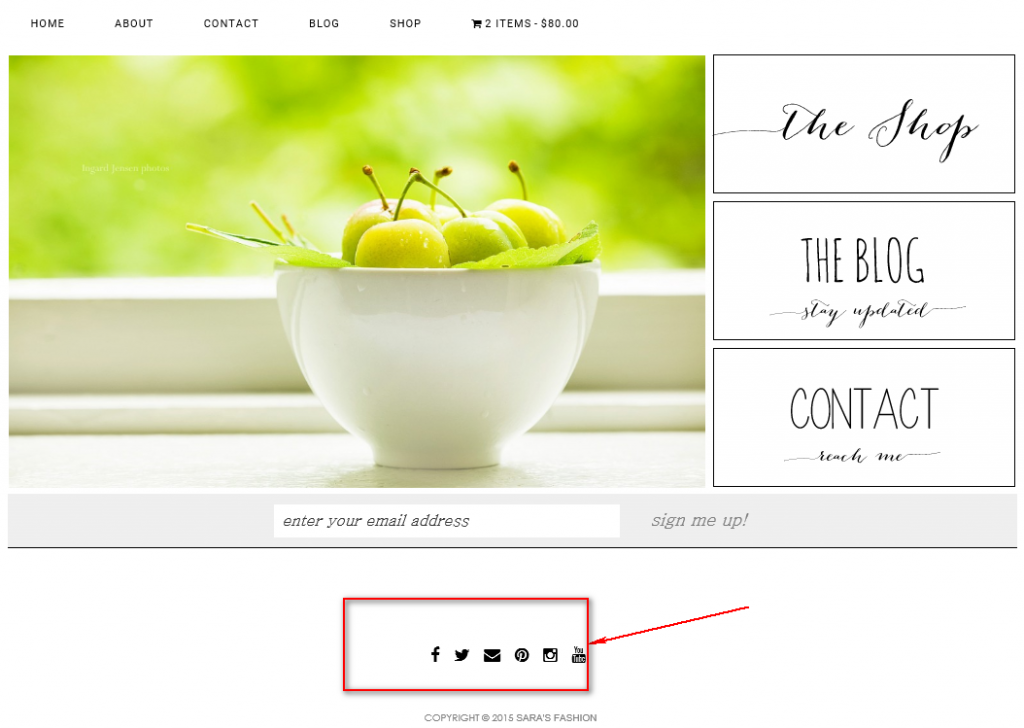
- Now you should have all these 3 boxes setup and display like the following.
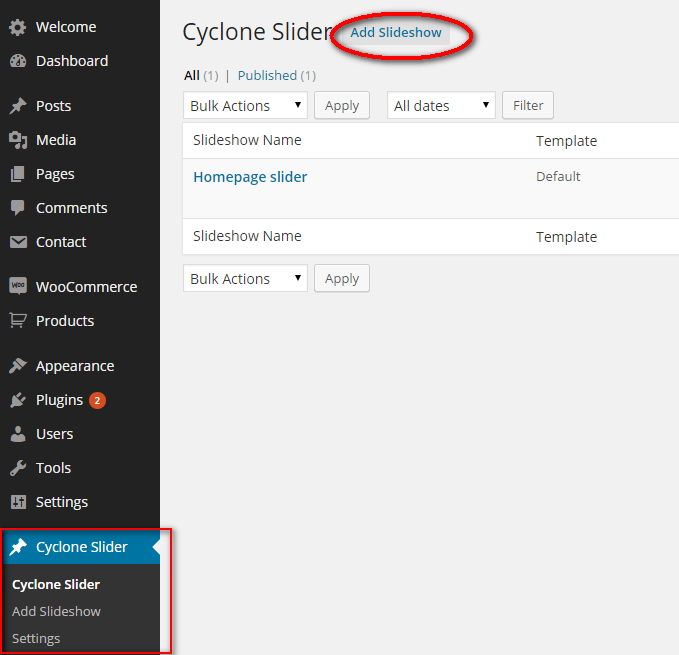
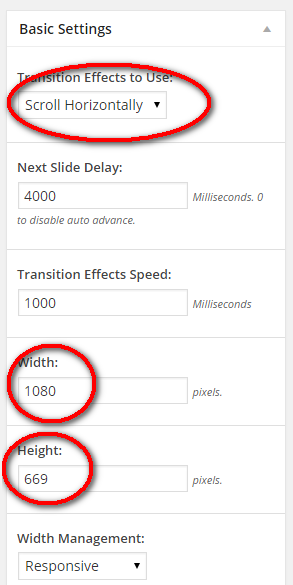
- After you have installed and activated the cyclone slider, add a new slideshow and make sure your settings are same as you see here in the following screenshot.
- You can easily add slides to your slider using images from your media library or that you upload.
 Settings:
- After you are done creating and adding images to the slider, it’s time to drag and drop this slider to your home page widget. Go back to your widgets under Appearance section and drag the cyclone widget onto your home page slider widget place holder.
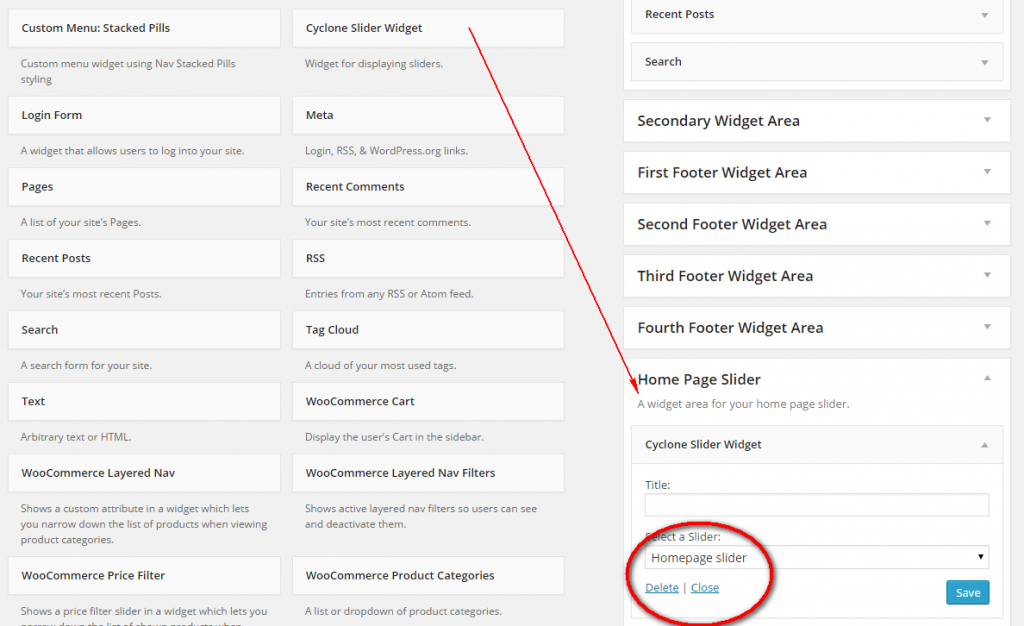
- At this time, your home page slider and 3 boxes should be ready
- Before you begin, you should already have the MailChimp plugin installed and activated. You can create your free account at mailchimp so you can start getting subscriptions.
- Drag and drop a text widget on “Home Page subscriber box” widget place holder and copy and paste the following code.
- Remember to update the <form action line with your mailchimp list url which you can get after creating a subscribers list on mailchimp.com. You can find this url in mailchimp by going to lists–>signup forms–>general forms. Partway down the page is your signup form url.
<div id="mailchimp" class="subscribe-box">

<div><!-- Begin MailChimp Signup Form -->

<form action="YOUR LIST URL" method="post" id="mc-embedded-subscribe-form" name="mc-embedded-subscribe-form" class="validate" target="_blank" novalidate>

<input type="email" placeholder="enter your email address" name="EMAIL" class="required email" id="mce-EMAIL">

<input type="submit" value="Sign me up!" name="subscribe" id="mc-embedded-subscribe" class="button" >

<div class="response" id="mce-error-response" style="display:none"></div>

<div class="response" id="mce-success-response" style="display:none"></div>

</form>

<!--End mc_embed_signup-->

</div>

</div>
SETTING UP SOCIAL MEDIA ICONS (HOME PAGE FOOTER)
- Drag and drop a text widget in the home page footer and copy and paste the code inside the text widget to look like the following.
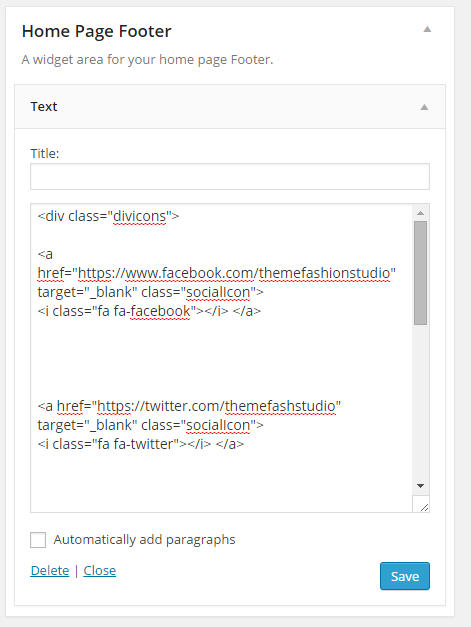
- Your social media code:
<div class="divicons">

<!--FACEBOOK -->

<a href="https://www.facebook.com/themefashionstudio" target="_blank" class="socialIcon">

<i class="fa fa-facebook"></i></a>

<!-- TWITTER-->

<a href="https://twitter.com/themefashstudio" target="_blank" class="socialIcon">

<i class="fa fa-twitter"></i></a>

<!--EMAIL-->

<a href="mailto:customerservice@themefashion.net" class="socialIcon ">

<i class="fa fa-envelope"></i></a>

<!--PINTEREST-->

<a href="https://www.pinterest.com/themefashstudio/" target="_blank" class="socialIcon ">

<i class="fa fa-pinterest"></i></a>

<!-- INSTAGRAM -->

<a href="#" target="_blank" class="socialIcon ">

<i class="fa fa-instagram"></i></a>

<!-- YOUTUBE-->

<a href="#" target="_blank" class="socialIcon">

<i class="fa fa-youtube"></i></a>

</div> - After that simply update the URLs to point to your own social media accounts.S
Setting Up Your Navigation Menu
Under appearance – Menus, use the wordpress menu function to create and add your pages to a menu. Check the boxes to add the menu to both main and primary navigation. You can see more on how to do this here: https://www.themefashion.net/wordpress-theme-installation/
Adding Social Sharing
Install and activate the JetPack plugin. Connect to wordpress.com and choose the free version (unless you want additional premium features).
Navigate to settings — sharing and turn on the option to add sharing buttons to your posts
Click the link to configure your sharing buttons
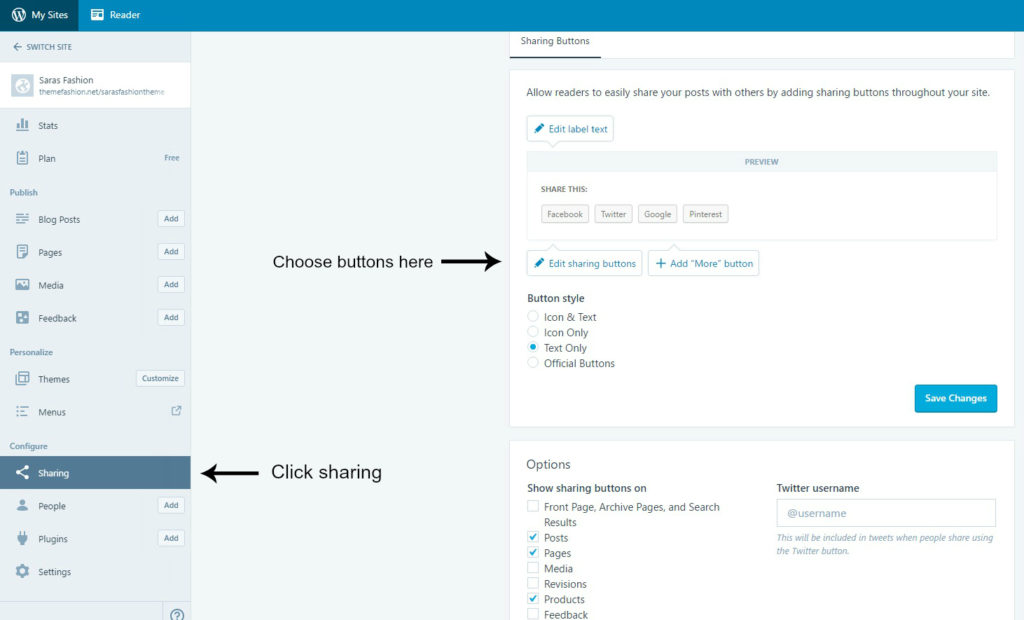
Click sharing and select buttons to add. The demos are set with text only. Set the buttons to show on posts and product pages at a minimum. Add them to other pages as desired. The demo also adds to front, archive, and search (note that they will not actually show on the front page, but this adds them to the main blog archive)
Click save changes.
